
A sourdough starter is similar in many ways* to the tortoise – with love, care and regular meals it can last a lifetime and give many hours of contemplative pleasure. On the other hand, with indifference, neglect and irregular feeding, like Freda from Blue Peter, it’s prone to die a slow, silent and lonely death. Regrettably, shamefully, but not entirely unexpectedly this was the fate which beset the nascent yumblog starter a long long time before it was able to celebrate its first birthday. Fortunately unlike Valerie, Peter and John, we didn’t have to go on live television before an audience of a million wide-eyed kiddiewinks and tell them their beloved proxy pet had snuffed it unnoticed and unloved in a garage over winter. Also unlike V, P & J we can knock up a near identical replacement in a matter of a days and with the most rudimentary of ingredients.
The universal advice on making raisin water sourdough is to only use organic raisins and the purest spring water, else the preservatives on the fruit and the chlorine in the tap water will impede the development of the natural yeasts. However, expedience and a reluctance to source special ingredients meant we ignored this advice and used what was to hand – bog standard raisins and Yorkshire tap water. That said, our starter was bubbling away nicely after a few days so it would seem this break from the perceived wisdom had no adverse effect.
Incidentally this particular starter was conceived on yumblog junior’s second birthday so we’ll always have a reference point for its exact age, being as it is (obviously) exactly two years younger than the sprog. In fact we might even present her with a dollop on her 16th birthday – imagine her unbridled delight.
Preparation time: 2 minutes plus a week
Cooking time: n/a
Makes: enough for a lifetime’s baking
Skill level: easy
Ingredients
Phase 1
- raisins – 500g
- water – 500ml
- sugar – 1tsp
Phase 2
- raisin water – 250ml
- strong white flour – 250g
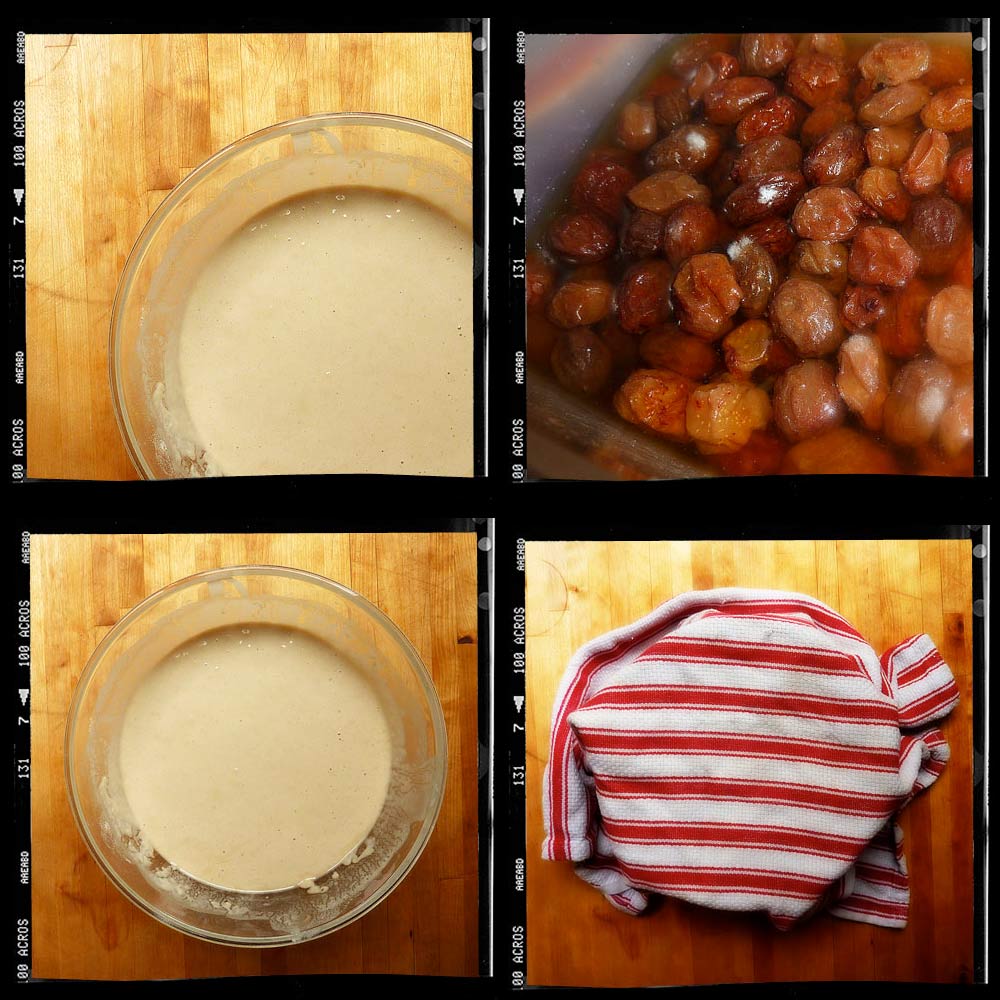
Put the raisins, water and sugar into a (Tupperware/Lock’n’Lock/old Chinese takeaway) container and seal it tightly.
Leave it for 5 days at room temperature to allow the bacteria to form.
Sieve out the raisins… squeeze out as much juice as you can.
Next, pour the 250 ml of raisin liquid into a bowl and add the flour.
Mix for a couple of minutes with an electric mixer.
Cover with cling film and leave at room temperature for a day or two until fermentation begins and and bubbles form.
Pour into a sealable container and refrigerate.
You now have a sourdough starter.
* not really when you think about it.
Verdict: After a week we had an enthusiastic and energetic starter with which to share a lifetime of bread making.
Drink: Hmm, a lifetime’s worth of drinking. Doesn’t bear thinking about.
Entertainment: …and a lifetime’s worth of entertainment … That’s 4,250 episodes of Cash in the Attic and a trip to Digger World.


Many thanks for the starter recipe which I have followed to the point of putting it into the fridge. What “feeding” regime do you advise from this point on?
many thanks
Hi Ed
Whenever you use your starter simply replace the amount used with the same amount of flour (and enough water to keep the consistency right). For example, if you remove 1 cup of starter, replace with 1 cup of flour and about half a cup of water.
If you don’t use your starter for a week, pour away 1 cups worth and feed as above.
Although you should feed your starter once a week, even if you have left it longer and it is looking dead, it is always worth feeding as it can often be resurrected.
Also (I have read) you can even freeze your starter if you are not going to be using it for a long period of time.
Hope this answers your question.
Best
R